


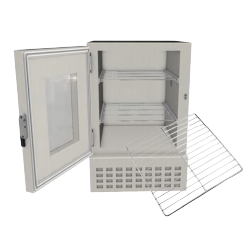
A walk-in freezer or cooler hinge is an essential element that cannot be compromised, a heavy-duty workhorse that is designed to safeguard thousands of dollars in perishable goods. It is engineered to support a 100kg+ door under the harsh conditions of sub-zero and high-moisture conditions. Whereas a Coleman cooler is designed to perform temporary cooling, a walk-in system must have permanent, industrial-grade door hardware. In case of failure, the effects are instant: bleeding energy bills, disastrous product wastage, and an overall operational collapse.
This document is your definitive guide. We offer a full system of proper fault diagnosis, correct component choice, safe replacement, and advanced troubleshooting so that this vital component will never be your weak point again.
Hinge Failure: Signs, Symptoms & Critical Risks
Before a hinge fails completely, it sends out clear warning signs. The initial step in prevention is the identification of these symptoms. Ignoring them is not just a maintenance oversight; it’s a critical business risk.
Your walk-in door may feel “off.” It might require a specific lift or pull to close properly. These are not quirks; these are the first indicators of mechanical failure.
5 Signs Your Hinge is Failing
- Door Sagging: This is the most obvious symptom. The door’s own weight, no longer correctly supported, causes it to droop. The handle-side corner will begin to scrape the floor, leaving a visible arc. This is the hinge beginning to lose its structural integrity.
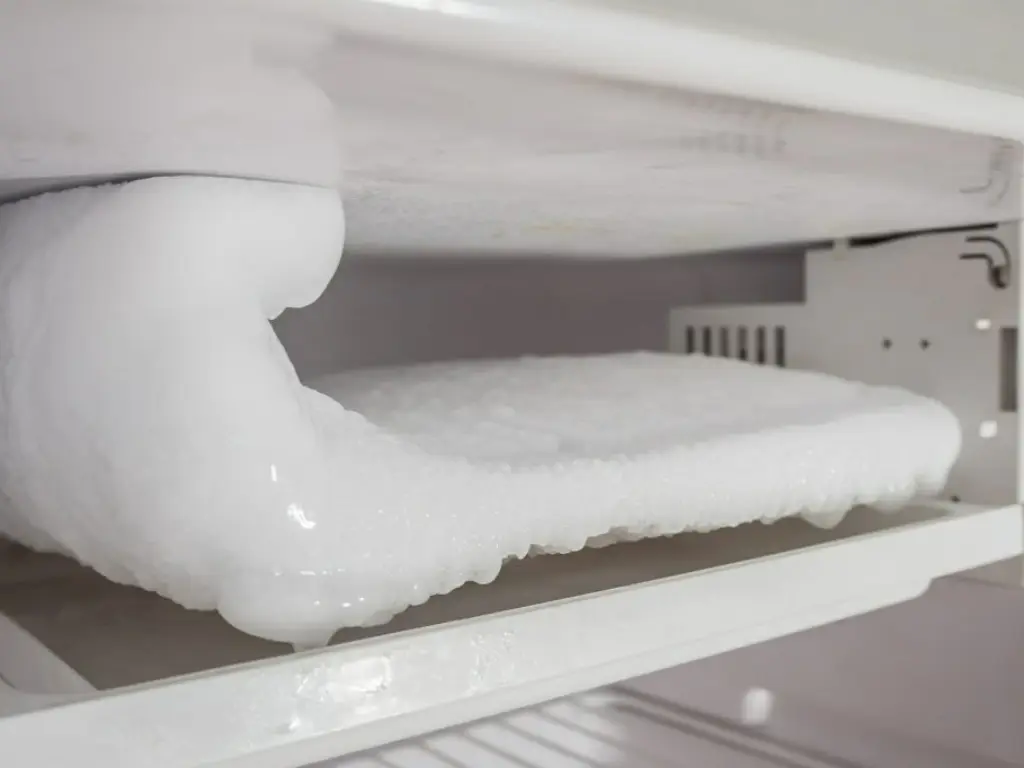
- Poor Seal / Frost Build-up: You see a snowy or icy buildup on the cooler door gaskets or cooler gaskets (the rubber seal) or around the door frame. This is a definitive sign that the door is not closing tightly. Warm, humid air from the outside is being drawn in, instantly freezing on contact.
- Grinding Noises: You hear a metallic screech, a “pop,” or a grinding sound when the door is opened or closed. This is the sound of metal components binding or of a worn-out cam.
- Visible Damage: A visual inspection reveals the obvious: stress fractures in the hinge body, advanced rust (corrosion) eating away at the metal, or a hinge pin that has worked its way loose.
- Failure to Self-Close: A cam-lift hinge that no longer pulls the door shut on its own, or a spring-loaded hinge that has lost its “snap,” is a failed component. The self-closing mechanism is not a convenience; it is the primary defense against temperature loss.
Why This Is a Critical Business Risk
It is a threat that is affecting your operation. It is an active threat to your operation.
- The Safety Liability: This is the most severe risk.Legally (as in the case of OSHA regulations in the US), walk-in freezers should have an interior safety release system to avoid the entrapment of employees. When a door sags or misaligns due to a bad hinge, that safety release mechanism can bind, jam, or fail to operate. A sagging door turns your freezer from a cold room into a potential trap. This is a liability that is life-threatening.
- The Compliance & Spoilage Risk: This is the financial risk. A weak seal implies that the compressor will have to operate continuously to counter the intrusion of hot, moist air. More to the point, such a bad seal renders it impossible to keep a stable, food-safe temperature (below 4°C / 40°F). This has two catastrophic consequences:
- Compliance Failure: This temperature violation will be detected by a health department inspection, and fines or a forced closure will occur.
- Spoilage: Your inventory- food, medicine, or samples- is spoiled, and this causes thousands of dollars in direct product loss.
The Complete Selection Guide: Finding Your Hinge
We have now determined the urgency, and we now need to choose the replacement. This is the most important step of the process. Making the wrong hinge will ensure a second repair, will cost you twice in freight, and will increase your downtime twofold.
On your current hardware, you need to determine four specifications
Step 1: Function (Cam-Rise vs. Spring-Assisted)
This determines how your heavy-duty door closes and seals. They cannot be used interchangeably. Use this table for a quick comparison:
| Feature | Cam-Rise (e.g., Kason 1245) | Spring-Assisted (e.g., Kason 1248) |
| Mechanism | Internal nylon cam | Internal coiled spring |
| Closing Action | Smooth, gravity-powered (lifts door on open, drops on close) | Aggressive, active pull (spring pulls door shut) |
| Key Advantage | High durability, smooth operation | Maximum sealing force, powerful close |
| Best For | Standard indoor walk-ins, high-traffic doors | Heavy doors, outdoor units, uneven floors |
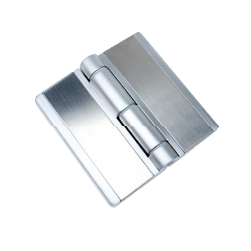
- Cam-Rise: This is a fine work of engineering and the most widespread type of walk-in. The “cam” is a precisely angled ramp, often made of durable nylon, hidden inside the hinge mechanism. As you open the door, the hinge strap rides up this cam, which slightly lifts the entire heavy door. On letting go of the handle, gravity comes into play. The weight of the door itself is so great that it rides down the cam, closing the door in a smooth, controlled, and firm movement.
- Spring-Assisted: This is the high-power option. This mechanism provides an aggressive, active closing force, often called the extra closing force. Besides (and in some cases instead of) a cam, this hinge has a strong, coiled spring. This mechanism offers an aggressive, active closing force. It does not merely permit the door to close; it draws it closed with force.
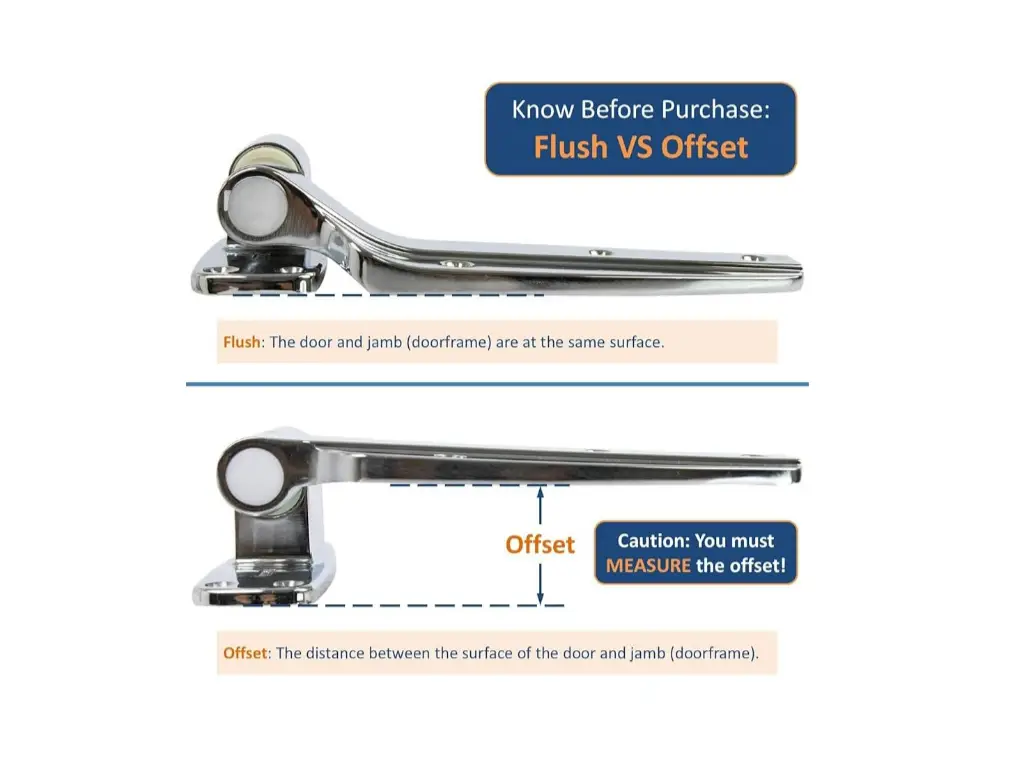
Step 2: Offset (How to Measure Correctly)
This is the most important measure in the whole process and the one that is most likely to be confused.. Determining the correct offset starts with defining your door type. A Flush configuration is the simplest: the door and the frame are on the same vertical plane, meaning the hinge mounting surface on the door is flat with the mounting surface on the frame, resulting in an offset of 0″. On the other hand, the most typical arrangement of an offset door in a walk-in freezer or cooler is an Offset configuration. This implies that the door is inset, i.e., it is slightly embedded in the front surface of the frame, forming a critical step that the hinge must span. You must measure the horizontal distance from the outer face of the walk-in’s frame to the outer face of the door.
Do not measure the old hinge itself; it may be bent. Measure the door’s position relative to the frame. This measurement is your offset. Common offsets include 1-1/8″, 1-1/4″, and 1-3/8″. If you have a 1-1/4″ offset and you buy a 1-1/8″ hinge, your door will not seal. The gasket will miss the frame entirely. There is no room for error here.
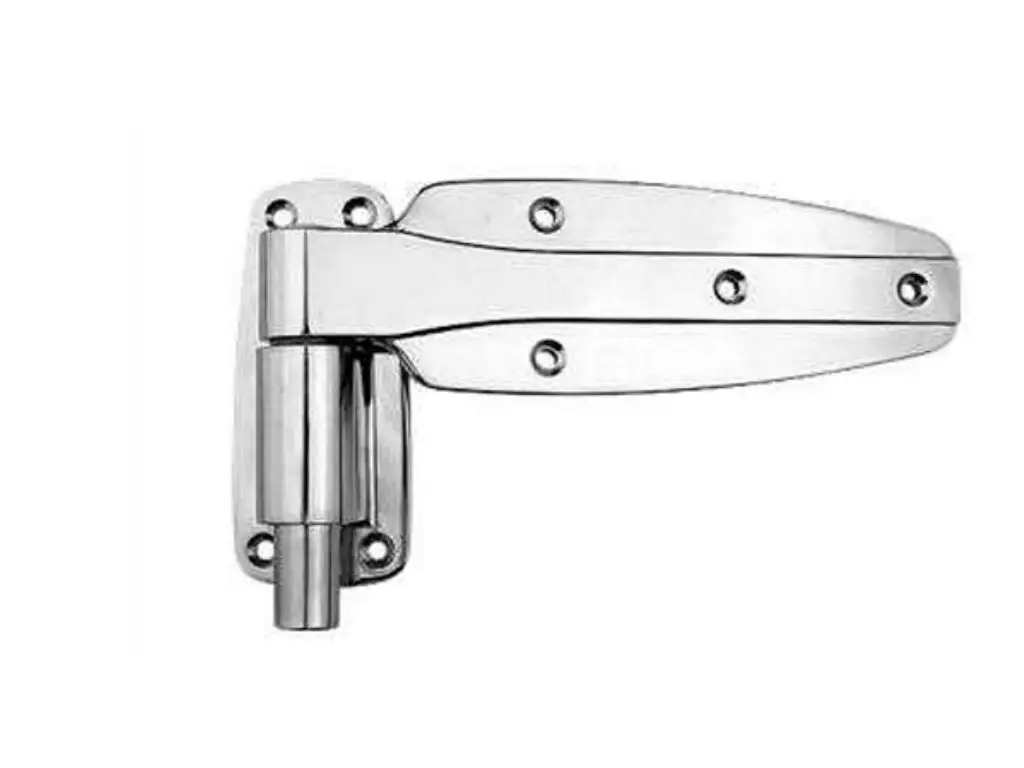
Step 3: Material, Handing & Door Weight
Use this table to confirm the final specifications.
| Specification | How to Check | Why It’s Critical |
| Material | Must be Stainless Steel (SUS304/316) or heavy-duty galvanized/zinc-plated. | Standard steel will rust and fail rapidly in the low-temperature, high-moisture environment. |
| Handing | Stand outside. If the hinges are on your left, it is a left-hand door. | Many hinges are reversible, but you must confirm this. A non-reversible hinge bought for the wrong side is useless. |
| Door Weight | Check the door’s manual or estimate its weight. | Ensure the new hinges’ combined load rating (e.g., 3 hinges at 50kg each) exceeds your door’s weight (e.g., 100kg). |
Step 4: Decode Mainstream Brands & Part Numbers
You don’t need to guess. Often, the part number is stamped directly on your old hinge. Here is how to decode the industry standards:
- Kason (The Industry Standard):
- Kason 1245 Series: This is the quintessential Cam-Rise hinge. If you see “1245” or “1246”, you are looking at the gravity-powered workhorse for most standard indoor walk-ins.
- Kason 1248 Series: This is the standard Spring-Assisted hinge. If your door is heavy or needs an aggressive seal (like an outdoor unit), you will often find a “1248” model.
- Kason 1255 / 1256 Series: These are heavy-duty “Pacesetter” hinges, often spring-assisted and designed for high-traffic or larger doors.
- CHG (Component Hardware Group) & Standard-Keil:
- These are also market leaders and can be easily substituted with Kason. They apply the same logic of numbering. As an example, a “Keil 9245” or “CHG 2450” series will frequently be used to do the same thing as a Kason 1245 (Cam-Rise).
- The key is to use the part number to confirm the function (Cam-Rise vs. Spring) and the offset, which is often stamped on the hinge base (e.g., “1-1/4”).
How to Replace & Adjust Your Hinge (The Full Process)
With the correct replacement hinge in hand, we move to installation. This is a manageable, DIY-capable job, but it demands respect for the materials and an unwavering focus on safety. A walk-in freezer door used for commercial purposes is weighty and can be very dangerous unless it is operated with accuracy.
Tools You’ll Need
- Complete socket wrench set (or impact driver)
- Heavy-duty screwdriver
- Pry bar
- A spirit level (a 2-foot or longer level is ideal)
- Wood shims or wedges
- A hydraulic floor jack or several strong wooden blocks for bracing
Safety Warning
Before you loosen a single bolt, you MUST brace the door. That 100kg+ door is only supported by the hinges. To stabilize the door, place your wood blocks or a hydraulic floor jack under the handle-side bottom corner. You have to lift the support till it supports the entire weight of the door, and it is firm, and cannot be moved even when the hinges are taken out. Moreover, it is highly suggested as a two-person task; one individual should be focused on door stabilization only, and the other on the hardware.
The Replacement Process
Follow this sequence precisely to maintain control and alignment.
- Brace: verify the door’s weight is fully supported by your jack or blocks. It should not wobble.
- Replace One by One: Do not remove all the old hinges at once. It is a fatal mistake that will cause the door to fall. The top hinge is always the first to begin with.
- Remove & Install Top Hinge: Carefully loosen and remove the bolts from the frame, then from the door. Remove the old hinge. Position the new hinge. Loosely thread all bolts by hand first to prevent cross-threading.
- Repeat: Move to the bottom hinge and replace it in the same way. Finally, replace the middle hinge(s) and check the roller action.
- Adjust: With all new hinges in place (and their bolts still just “snug,” not fully tightened), slowly lower the jack or remove the blocks just enough for the door to swing. This is the adjustment phase.
- Tighten: Once you are satisfied with the alignment (see below), tighten all bolts completely. The work is completed when the door opens and closes without any trouble.
How to Adjust for a Perfect Seal
Do not just screw the bolts and walk off. The last 10 percent of the work is adjustment, which provides a flawless seal.
- With the bolts still snug, place your spirit level on top of the door. Ensure it is perfectly level. Test the side of the door to make sure that it is plumb (vertical). Adjust the door’s position by slightly moving it on the loose hinges until it is square.
- Now, close the door. Look at the gasket. Is it compressing evenly all the way around? There should not be any place where you can slide a piece of paper between the gasket and the frame. If it’s tight at the top but loose at the bottom, the door needs further adjustment. This step is the difference between a successful repair and a failed one.
DIY vs. Calling a Pro
Be honest with your skill level. When your door is hefty (100kg+), the frame is aged, or you do not feel confident about your skills to fit the door perfectly to create a tight fit, hire a professional. The few dollars you save on a DIY installation can be lost a thousand times over in energy waste from an imperfect seal.
How to Prevent It from Breaking Again (Maintenance)
You have successfully installed your new hinge. The door is level, and the seal is perfect. Your work is not finished. Installation is an event; maintenance is a process. These simple steps will ensure your new hinges last for years, not months.
This preventative maintenance schedule will protect your investment.
| Maintenance Task | Specification / How-To | Recommended Frequency |
| Periodic Lubrication | Must use a food-grade, low-temperature synthetic lubricant. DO NOT use standard grease or WD-40, as they will freeze solid. | Every 6 Months |
| Cleaning | Use a cloth to wipe ice, grime, and food debris from the hinge’s moving parts. Buildup acts as a wedge and destroys the mechanism. | Every Month |
| Inspecting Fasteners | Use a wrench to check and tighten all mounting bolts. Vibrations and heavy use will cause them to loosen over time. | Every 3 Months |
Advanced Troubleshooting: When It’s Not Just the Hinge
You did everything right. You purchased the correct hinge, fitted it correctly, and adjusted it. But the door never closes right, or it is so difficult to open.
Before you blame the new hinge, it is time for advanced troubleshooting. The problem is likely not the hinge itself, but a deeper, structural issue with the walk-in box or its related door hardware. Use this diagnostic table to identify the root cause.
| Symptom | Possible Cause (Not the Hinge) | Recommended Action |
| Door still sags or binds after new hinge installation. | 1. Water-Logged Door: Internal insulation is saturated with ice, making the door excessively heavy (100kg+). | Check the door’s weight. You may need to replace the entire door panel. |
| 2. Warped Frame: The entire walk-in frame is no longer square. | Use a long level to check the frame for warping. This may require a professional to re-frame the opening. | |
| Door is very hard to pull open (feels vacuum-sealed). | Blocked Pressure Relief Port: The vent is clogged with ice, creating a strong vacuum. | Locate the pressure port (usually a heated vent on the wall) and safely clear the ice. |
| Door “bounces” open after closing. | Blocked Pressure Relief Port: Air pressure cannot escape as the door closes, “bouncing” it back. | Locate the pressure port and safely clear the ice. |
Cause Analysis: Why Your Hinges Keep Failing
This leads to the question of the greatest importance. Why are you here in the first place? When you are changing hinges annually or biannually, you are in a rut. You are curing the symptom, not completely eradicating the cause. Regularly doing sophisticated troubleshooting is not a long-term maintenance strategy. The cause of chronic failure is nearly always two-fold.
First, there is a failure of Quality and Materials. One of the worst environments for any mechanical part is a walk-in freezer. It is not only the weight of the door that is the challenge, but the environment itself. Normal metals may fracture at -10°C, and standard lubricants solidify. The constant cycle of opening (letting in warm, humid air) and closing (freezing) creates condensation and ice, promoting aggressive rust. A typical hinge, such as a fire hose hinge, is not made to do so; it is doomed to fail.
Second, System Compatibility fails. Your walk-in door is an ecosystem. Its Hinge, its Handle, and its Latch should be in perfect harmony. The thing is that this harmony is lost during the years of patching up. A new latch is fitted, which has a varying pull strength. These conflicting elements are now competing against one another. The top hinge is subjected to an abnormal twisting force (torque) by the handle. The misaligned latch must slam, and the hinge pins are shocked. A good hinge will be ruined even when it is compelled to struggle against the other parts of its own door.
Thus, a real, long-term solution should fulfill two indispensable requirements:
- It should be constructed using materials that have been designed to endure the high temperature and moisture (addressing the Quality problem).
- It should be designed as an integrated system, with the hinge, handle, and latch being designed to interact (resolving the Compatibility problem).
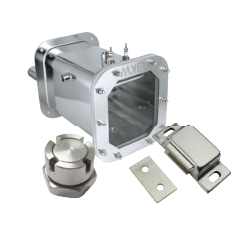
Achieving Long-Term Reliability: KUNLONG’s Core Advantages
This is exactly the philosophy of the specialist manufacturers such as KUNLONG ( https://www.kunlonghardware.com/). They do not just manufacture hinges; they engineer a complete ecosystem of industrial structure parts—including locks, hinges, handles, latches, small business shop products, and accessories. Their engineering philosophy directly addresses the root causes of chronic failure, offering proven performance where standard parts fail. This is what actually counts towards your long-term operational success.
- Extreme Environment Expertise: The components of KUNLONG are cast in environments that are much more extreme than a normal walk-in. Having 35% of their core business in environmental test chambers, their parts are engineered to the ground to work reliably at -70°C and on doors over 100kg. Your freezer is well within their established standard of operation.
- System Compatibility: KUNLONG has a committed R&D team of 30 engineers, and they make sure that their handles, latches, and hinges are compatible. The load rating of the hinge is equal to the pull force of the latch. This gets rid of the source of systemic failure-mismatched components- at the very beginning.
- Durability Beyond the Standard: Data proves true industrial quality. The components of KUNLONG are tested under a strict 15-item testing protocol. A critical example is the Salt Spray Test: while many competitors meet the 300-hour standard, KUNLONG’s components are tested for 400 to 1000 hours, guaranteeing superior corrosion resistance in the damp, high-moisture environment of a walk-in freezer.
Frequently Asked Questions (FAQ)
To save time and avoid expensive mistakes, we have listed the three most frequent questions.
Can I mix different hinge types or brands?
It is highly discouraged. Mixing a cam-rise hinge with a spring-assisted one, or two different brands, creates uneven load points and differing closing speeds. The hinges will be fighting against each other and will exert a lot of stress on the door panel and the frame, ensuring that one or both of them will fail prematurely.
What’s better: Zinc, Chrome, or Stainless Steel?
As stated earlier, this is all a matter of the environment of your fridge or cooler. Most indoor walk-ins do not require anything more than a standard Zinc/Chrome finish. But in any outdoor unit, or any indoor fridge unit in a high-moisture or corrosive wash-down (such as seafood or meat processing), then Stainless Steel is required.. When choosing stainless steel, demand proof of its quality. Ask the supplier for their high-standard salt spray test reports (400+ hours) to ensure you are getting true, long-term durability.
Do you offer 3D models for planning?
Yes. This is a characteristic of a contemporary, engineering-oriented manufacturer. Firms such as KUNLONG, which have a robust R&D department, offer downloads of 3D models of their standard components. This allows your technicians or designers to digitally verify the fit, offset, and hole patterns before purchase, eliminating guesswork and saving invaluable time.
Do walk-in freezer door hinges come with warranties?
Walk-in freezer door hinges, in most instances, do have warranties, which are normally offered by manufacturers or suppliers. To find out whether you are entitled to hinge replacement or repair, it is possible to check the terms of your warranty when you have a failure.