


Understanding Industrial Oven Systems Why Parts Selection Starts with the Oven Type
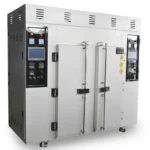
Here is something most parts catalogs will not tell you: not all industrial ovens are built the same way, and the parts that keep them running depend entirely on the type of oven you operate.
A heating element that works perfectly in a batch oven may fail within months in a continuous conveyor oven. A door gasket rated for 450°F will disintegrate in a vacuum furnace running at 800°F. The oven type determines everything: material grades, temperature tolerances, mounting configurations, and safety requirements.
| Oven Type | Typical Temperature Range | Key Part Categories | Common Failure Points |
|---|---|---|---|
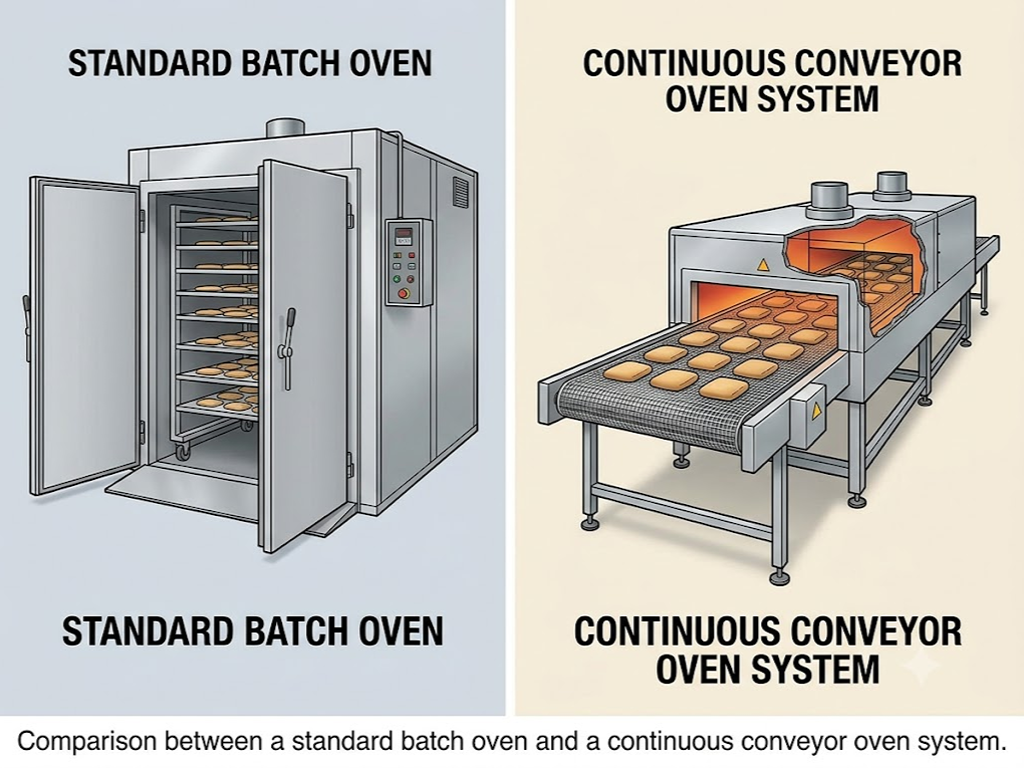
| Batch Ovens | 200°F 1,200°F | Heating elements, fans, door gaskets, thermocouples | Uneven heating, seal degradation, fan motor wear |
| Continuous/Conveyor Ovens | 300°F 1,400°F | Conveyor belts, heating elements, blower motors, SSRs | Belt wear, hot-spot burnout, drive motor failure |
| Vacuum Ovens | 200°F 800°F | Vacuum pumps, specialized seals, heating platens | Vacuum leaks, pump oil contamination, slow heat transfer |
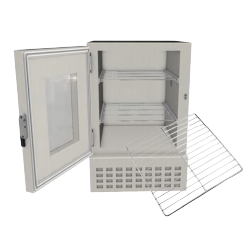
| Walk-in/Cabinet Ovens | 150°F 1,000°F | Door gaskets, fans, shelving, control panels | Door seal leaks, airflow blockages, controller drift |
Think of it this way: selecting parts without knowing your oven type is like ordering tires without knowing whether you drive a sedan or a semi-truck. The part may fit, but it will not perform. And when a heating element fails mid-batch, the cost is measured in scrapped product, not just the price of the replacement part.
Heating System Parts The Heart of Your Industrial Oven
Your heating system is only as reliable as its weakest component. Statistically, that component is the one whose replacement interval you do not track. Before exploring specific part types, run a quick self-assessment: for each component in your heating system, do you know when it was last replaced, whether it is approaching its rated lifespan, and whether its most recent performance data shows any drift?
Types of Heating Elements Matching Material to Temperature Range
Heating elements are the single most frequently replaced part in any industrial oven. The most expensive mistake you can make is choosing the wrong material for your temperature range and atmosphere.
| Material | Max Continuous Temp | Best For | Typical Lifespan | Relative Cost |
|---|---|---|---|---|
| NiCr 80/20 (Nichrome) | 1,100°C (2,012°F) | General-purpose electric ovens, good ductility after cycling | 3 5 years | $$ |
| FeCrAl (Kanthal A1) | 1,300°C (2,372°F) | High-temperature furnaces, lowest cost per ohm | 2 4 years (becomes brittle) | $ |
| Incoloy 800 (sheath) | 815°C (1,500°F) | Corrosive or oxidizing atmospheres, tubular element sheaths | 5 8 years | $$$ |
| Silicon Carbide (SiC) | 1,400 1,600°C | Ultra-high-temperature furnaces, non-metal alternative | 1 3 years | $$$$ |
The material choice matters because failure modes differ. NiCr elements operating between 900°C and 1,000°C in reducing atmospheres can suffer from “green rot” a selective chromium oxidation that leaves the element brittle and prone to cracking (an industry phenomenon well documented in heat-treating literature). FeCrAl elements, while capable of higher temperatures, become increasingly brittle after each thermal cycle and should never be mechanically stressed after service. Incoloy 800, commonly used as a sheath material in tubular elements, offers superior corrosion resistance with a typical composition of 30 35% nickel, 19 23% chromium, and a balance of iron.
If the measured resistance deviates more than 10% from the original specification, replace the element even if it is still heating. Running an aging element alongside new ones creates temperature imbalances that are harder to diagnose than a complete failure. Replace all elements in a bank simultaneously.
Temperature Sensors Thermocouples, RTDs, and When Accuracy Matters
A temperature sensor that drifts out of calibration is more dangerous than one that fails outright, because you do not know it is wrong. Your thermocouple could be reading 850°F while the actual temperature is 870°F. For a solution heat-treatment process requiring ±10°F uniformity per AMS 2750 Class 2 standards, that 20°F error is the difference between a conforming batch and a complete loss.
| Sensor Type | Temperature Range | Accuracy | Best Application |
|---|---|---|---|
| Type K Thermocouple | 200°C to +1,260°C | ±2.2°C | General industrial ovens, broadest range |
| Type J Thermocouple | 40°C to +750°C | ±2.2°C | Lower-temperature ovens, aging/curing |
| PT100 RTD | 200°C to +850°C | ±0.1°C | Precision processes needing tight control |
The rule of thumb: if your process tolerance is ±5°F or tighter, do not use a thermocouple use an RTD. And regardless of sensor type, expect a drift of 1 2°F per year under normal operation. In ovens that frequently cycle near their upper temperature limit, that drift can accelerate to 1 2°F per month.
Solid State Relays and Contactors The Power Gatekeepers
Solid state relays (SSRs) are the second most common electrical failure point after heating elements. The leading cause of SSR failure is not manufacturing defects. It is inadequate heat dissipation. Every 10°C increase in operating temperature cuts SSR life in half.
When selecting an SSR, follow the golden rule: rate the SSR for at least 1.5 2 times your actual load current. A 40-amp heating circuit needs a 60 80 amp SSR, not a 40-amp one. Mechanical contactors, by contrast, are better suited for applications with infrequent switching. They typically last 100,000 cycles under resistive load but wear out faster under inductive loads.
Warning signs before SSR failure: intermittent temperature fluctuations, unexplained controller errors, or a “chattering” sound during operation. Any of these signals means the SSR is degrading. Replace it during scheduled downtime, not after it fails mid-production.
Gas Burner Components Ignition, Flame Sensing, and Gas Train Parts
For gas-fired industrial ovens, the parts landscape is entirely different. Key components include:
- Igniters Hot surface igniters typically last 3 5 years; spark igniters last longer but their electrodes erode over time
- Flame sensors Clean with fine-grit sandpaper every 6 months to remove carbon buildup; a dirty sensor is the most common cause of unexpected burner shutdown
- Gas valves and pressure regulators These must meet NFPA 86 safety requirements. The standard mandates that safety shutoff valves be tested annually for leak-tight closure
Air Circulation and Ventilation Parts Keeping Heat Where It Belongs
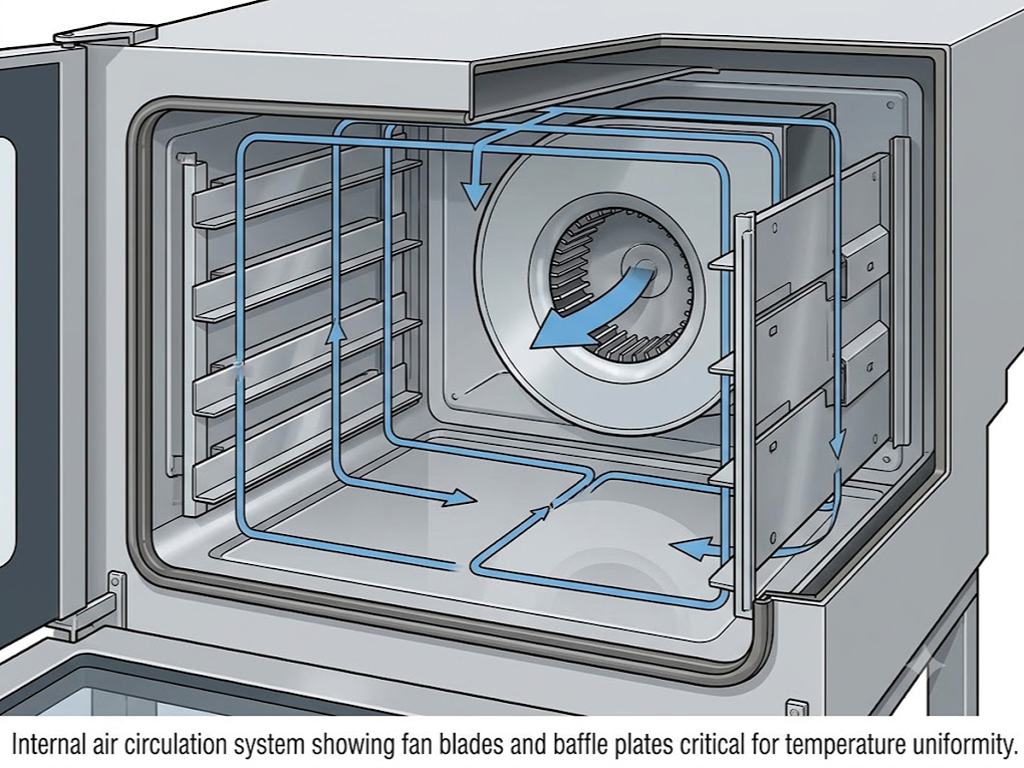
Temperature uniformity is what separates a precision industrial oven from a hot box. The AMS 2750 standard defines furnace classes by how tightly temperature can be controlled: Class 1 requires ±5°F uniformity, while Class 6 allows ±50°F. Achieving tight uniformity depends almost entirely on air circulation design.
The fan is the heart of this system. Fan blade material must match your temperature range: cast aluminum works up to about 350°F, stainless steel handles 350°F 750°F, and Inconel is required above 750°F. A damaged or unbalanced fan blade will create hot and cold spots that no controller can compensate for. The first symptom is usually a temperature spread exceeding 15°F across the work zone.
Fan motors need Class H insulation (rated for 180°C) as a minimum for industrial oven applications. If you are replacing a motor that burned out prematurely, check whether the original motor was correctly insulation-rated for its mounting position. Motors mounted inside the heated airstream have very different requirements from those mounted externally.
Air ducts and baffle plates are often overlooked during maintenance because they have no moving parts. But a warped baffle or a clogged return-air duct can silently degrade uniformity for months before anyone notices. During every preventive maintenance cycle, spend five minutes visually inspecting these components.
Control and Safety Components The Brain and the Brakes
Control and safety components are the least visible parts of an industrial oven, and the most deceptive when they fail. A failing temperature controller rarely announces itself. Instead, it produces subtle symptoms: a batch that just does not come out right, a cycle that takes slightly longer than it used to.
| Component | Function | Failure Mode | Replacement Indicator |
|---|---|---|---|
| Digital Temperature Controller | Executes PID control loop, manages setpoints and ramps | Display failure, PID parameter corruption, relay output burnout | Erratic readings, inability to hold setpoint |
| High-Limit Thermostat | Independent over-temperature safety cutoff (NFPA 86 required) | Trips at wrong temperature or fails to trip at all | Test monthly if it does not trip within 5% of setpoint, replace immediately |
| EMI Filter | Suppresses electrical noise that can corrupt sensor readings | Capacitor degradation over 3 5 years | Unexplained sensor noise or controller resets |
| Fuses & Circuit Breakers | Overcurrent protection for each circuit branch | Fatigue from repeated near-limit operation | Any blown fuse should trigger an investigation, not just a replacement |
| Control Transformer | Steps down line voltage for control circuitry | Winding insulation breakdown from heat exposure | Intermittent control power loss |
NFPA 86 requires that the high-limit thermostat be completely independent of the primary control loop. It must be able to shut down the heat source even if the main controller fails in the “full on” position. This is not a redundancy you can skip.
Door, Seal, and Structural Parts The Unsung Heroes of Efficiency
Door gaskets, hinges, handles, and shelving rarely get attention until they cause a problem. A degraded door seal is one of the costliest minor issues in industrial oven operation. A leaking gasket can increase energy consumption by 20 30%, create cold spots near the door that ruin product quality, and in gas-fired ovens, allow combustion gases to enter the workspace.
Door gaskets and seals are wear items. They compress, harden, and crack over time. Material selection depends on temperature: silicone rubber gaskets work up to 450 500°F, fiberglass braided gaskets handle up to 1,000°F, and vermiculite gaskets are rated for up to 1,250°F. The easiest diagnostic test: close the door on a strip of paper. If you can pull the paper out without resistance, the gasket is no longer sealing. Replace it. A new gasket costs tens of dollars and takes fifteen minutes to install; the energy it wastes costs hundreds per year.
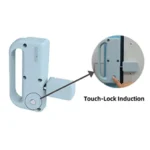
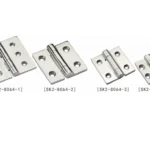
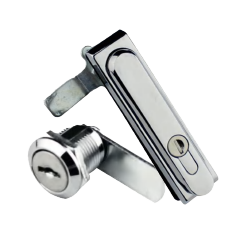
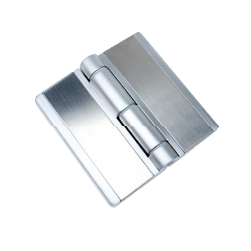
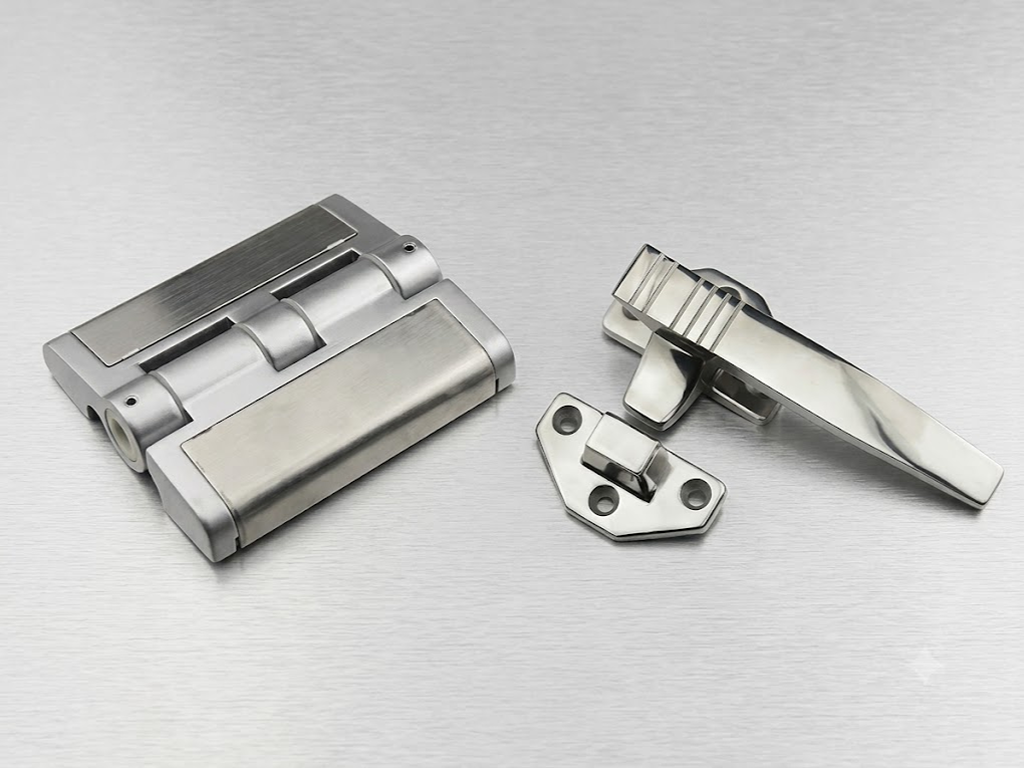
Hinges and latches take mechanical abuse every shift. When hinges wear, the door sags, the seal gap widens unevenly, and the problem compounds. For ovens operating above 500°F, hinges should be stainless steel. Standard carbon steel hinges will oxidize and seize. When selecting replacement oven handles, look for stainless steel construction (SUS304 at minimum, SUS316 for corrosive environments) and verify the cycle-life rating. Industrial-grade handles rated for 20,000+ cycles are common among manufacturers supplying the test chamber and oven equipment sector. Materials matter: a plastic or zinc-alloy handle that works on a storage cabinet will warp or fail within weeks on an industrial oven door.
Shelves and racks bear the load. Inspect for warping monthly. A warped shelf changes the distance between the product and the heating elements, creating uneven heating that is nearly impossible to diagnose because it varies with every load configuration. If a shelf shows visible curvature, replace it. The cost of a new shelf is trivial compared to the cost of one rejected batch.
Common Industrial Oven Failure Signs A Symptom-Based Diagnostic Guide
Industrial ovens are predictable machines. Every failure follows a pattern. Start with the symptom, rule out the simple causes first, and work toward the expensive parts only when the evidence points there. Here are the five most common failure scenarios and how to diagnose them.
Uneven Heating or Hot/Cold Spots
Temperature variation across the work zone is the most frequently reported oven problem, and the most frequently misdiagnosed. Before ordering new heating elements, follow this diagnostic sequence:
- Verify the problem is real. Use a 9-point temperature survey with calibrated thermocouples (per AMS 2750 methodology). A single thermocouple in one location cannot tell you whether the oven is uneven or the sensor is wrong.
- Inspect the fan. A damaged or unbalanced fan blade creates airflow dead zones. The telltale sign: a specific vibration frequency accompanied by localized temperature deviations exceeding 15°F.
- Check the baffles. A shifted or warped air distribution plate can redirect airflow away from part of the work zone.
- Inspect the door seal. A leak near the door seal produces a cold zone at the front of the oven the most common location for product quality issues.
- Test individual heating elements. In a multi-element oven, one failed element in a parallel bank may go unnoticed because the remaining elements compensate. But they cannot compensate evenly.
Slow Heat-Up or Failure to Reach Setpoint
When an oven takes longer to reach temperature or can no longer hit its maximum setpoint, the heating system is the primary suspect. But do not assume it is the heating elements.
Start with electrical measurements: check the resistance of each heating element and compare to its specification. A deviation exceeding 10% means the element is aging and should be replaced. Use a clamp meter to verify that each element is drawing its rated current. An element can show correct resistance at room temperature but fail under load. Next, test the SSR: measure the voltage drop across the output terminals when the SSR is commanded on. A healthy SSR drops less than 1.5 volts; anything higher means internal degradation. Finally, check for a missing phase in three-phase systems. A single blown fuse can cut power by one-third without tripping any alarm.
Temperature Overshoot or Cycling Instability
Overshoot is almost always a control problem, not a heating problem. The most common cause: incorrect PID parameters. If someone recently ran an auto-tune routine, check whether the resulting parameters are appropriate. Auto-tune algorithms can produce aggressive settings that overshoot in normal operation. The second most common cause: a thermocouple mounted too close to the heating elements. If the sensor is within 3 5 inches of an element, it will see radiant heat directly and cause the controller to cycle the heat source prematurely. The result is an oscillation that looks like instability but is actually a sensor placement problem.
Door Seal Leaks Energy Waste and Product Quality Issues
A leaking door seal is the highest-ROI repair in industrial oven maintenance. The test is simple: close the door on a strip of paper. If it pulls out with no resistance, replace the seal. When cutting a new gasket to length, use a 45° angle at the corners for a compression fit no adhesive needed. The seal should compress 25 35% when the door is closed. If the old seal shows more than 50% compression set (it stays flattened even when the door is open), it was overdue for replacement months ago.
Strange Noises, Vibrations, or Electrical Smells
These are your last warnings before a failure becomes a safety incident. Mechanical noises grinding, squealing, rattling almost always trace to the fan system. Check motor bearings: the typical lubrication interval is every 2,000 3,000 operating hours or every 6 months, whichever comes first. Electrical smells, particularly a sharp acrid odor, demand immediate attention. Shut down the oven, open the control panel, and check every terminal connection. A loose terminal creates resistance, resistance creates heat, and heat creates fire. Use a thermal imaging camera if available; any terminal that reads more than 10°C above its neighbors is loose and must be retorqued before restarting.
OEM vs. Aftermarket Parts A Practical Decision Framework for Buyers
The decision between OEM and aftermarket parts is not about which option is better in absolute terms. It is about matching the part’s criticality to your risk tolerance. Before every purchase, ask three questions: (1) If this part fails, what is my downtime cost per hour? (2) Is there a safety implication if the part does not perform as expected? (3) Do I have the in-house expertise to validate an aftermarket part’s quality before installation?
The Real Cost Difference Beyond the Price Tag
Most buyers compare unit prices. That is the most expensive way to make this decision.
Consider a real scenario: an OEM heating element costs $800 with a 2-year warranty. An aftermarket equivalent costs $350 with a 6-month warranty. On price alone, the aftermarket option looks like a $450 saving. But if that aftermarket element fails prematurely and causes one shift of unplanned downtime, at a conservative downtime cost of $1,000 per hour, the saving evaporates in less than 30 minutes.
The total cost of ownership formula is: Unit Price + Installation Labor + (Annual Failure Probability × Downtime Cost per Hour × Hours per Failure) ÷ Expected Lifespan in Years. For high-criticality parts where downtime is expensive, OEM is often the cheaper option when you do the full math. For low-criticality parts where a failure means swapping a shelf during the next shift change, aftermarket makes perfect sense.
How to Evaluate Aftermarket Part Quality A 5-Point Checklist
The problem with aftermarket parts is not that they are all low quality. It is that you cannot tell which ones are. Here is a verification checklist to use before placing an order:
- Material certification Can the supplier provide a material composition test report? If they claim Incoloy 800, the certificate should show 30 35% nickel and 19 23% chromium. If nickel is below 28%, it is not Incoloy 800.
- Dimensional tolerances Request dimensional inspection data for critical mounting points. A heating element that is 2mm too long will not fit, and you will discover this during installation, not during ordering.
- Electrical specifications For heating elements, measured cold resistance should be within ±5% of the specification. Anything outside that range indicates either the wrong alloy or poor manufacturing controls.
- Supplier qualifications Look for ISO 9001 as a minimum. For parts exported to the EU, verify RoHS and REACH compliance documentation exists. Not just mentioned on a website, but available as a PDF you can inspect.
- Sample testing Place a small trial order before committing to volume. A supplier who refuses to sell samples is a supplier who knows their parts will not pass inspection.
When to Stay OEM and When Aftermarket Makes Sense
Stay OEM when:
- The part is safety-critical: gas valves, flame sensors, high-limit switches (NFPA 86 defines which components fall into this category)
- The part is a proprietary controller board with no aftermarket equivalent
- Your equipment is under active warranty and aftermarket parts would void remaining coverage
- Your downtime cost exceeds $2,000 per hour the risk premium of aftermarket is not justified
Aftermarket can make sense when:
- The part is a simple mechanical component: shelves, door handles, hinges, feet
- The part is a generic electrical component with published specifications: SSRs, contactors, fuses
- You have in-house capability to inspect and validate incoming parts before installation
- Lead time is more critical than price aftermarket suppliers often ship faster than OEM backorders measured in weeks
1. If this part fails, what is my downtime cost per hour?
2. Is there a safety implication if this part underperforms?
3. Can I validate aftermarket quality before installation?
Sourcing Industrial Oven Parts Supplier Evaluation and Quality Verification
Finding a supplier is easy. Finding a supplier you can trust is the hard part, especially when sourcing internationally. Distance makes quality failures more expensive to resolve.
Verify certifications, but do not stop there. ISO 9001 tells you the supplier has a documented quality management system. It does not tell you whether they actually follow it. CE marking on electronic control components is mandatory for the EU market, but verify scope: a bare heating element typically does not require CE marking, while a complete temperature control assembly does. UL certification matters primarily for the North American market. Ask for copies of certificates, not just mentions on a website.
Test technical depth before placing an order. Send the supplier a specific technical question: “What steel mill supplies the Incoloy 800 tubing for your heating elements?” A competent supplier will answer with a mill name. A reseller with no technical capability will dodge the question or give a vague answer. This one-question test reveals more about supplier quality than any certification on their website.
Always start with a trial order. No matter how promising the supplier looks on paper, place a small trial order first ideally 5 10 units and inspect every single one before authorizing volume production. Third-party inspection services like SGS or Bureau Veritas typically charge $800 $1,500 for a basic factory audit. That is a fraction of the cost of receiving a container of unusable parts.
The best supplier is not the one with the lowest quote. It is the one who can tell you exactly why their part costs what it costs, and back that answer with data.
KUNLONG manufactures stainless steel oven handles and hinges rated for 20,000+ cycles. SUS304 and SUS316 materials, IP65 options available.
Talk to an EngineerReferences
- Zhuanghao Electric Heating Appliances. “Heating Element Alloys Compared: Nichrome, Kanthal, Incoloy 800/840 Selection Guide.” 2025.
- ANSI Blog. “SAE AMS 2750H-2024: Pyrometry.” 2024.
- ANSI Blog. “NFPA 86-2019: Standard for Ovens and Furnaces.”
- KUNLONG Hardware. “Oven Handles.” kunlonghardware.com/handles
- KUNLONG Hardware. “Industrial Hinges.” kunlonghardware.com/hinges
- KUNLONG Hardware. kunlonghardware.com